Inspection Case
MIV-X
MAIVIS Ultrasonic Optical Flaw Detector
Make It Visible!
Visualizing Cracks, Voids, Delamination, and Other Hidden Defects Normally Impossible to Check Visually
Anyone Can Quickly and Easily Perform a
Visual Surface Inspection
Thanks to Shimadzu’s proprietary light imagining technique,
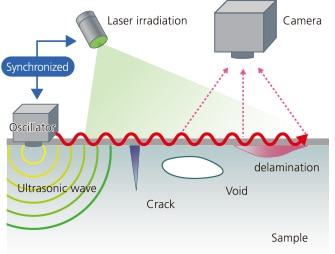
which combines an ultrasonic oscillator with a stroboscope,
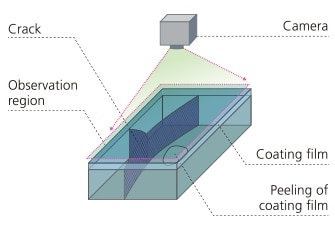
defects near the surface of a material, including peeling of the bonding and adhesive surfaces of heterogeneous materials, as well as paint, thermal sprays, and coatings can be inspected easily and non-destructively.
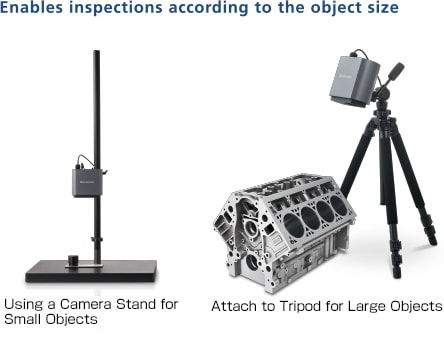
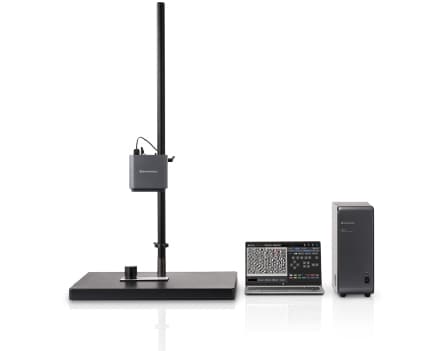
- Simply attach the ultrasonic oscillator to the sample, and position the camera above the inspection surface.
- The propagation of the ultrasound is quickly displayed, and flaws are easily identified from the video.
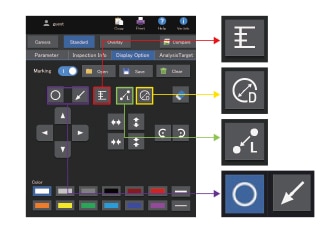
- The easy-to-operate software is enhanced with functions to mark the flaws and measure the size easily.
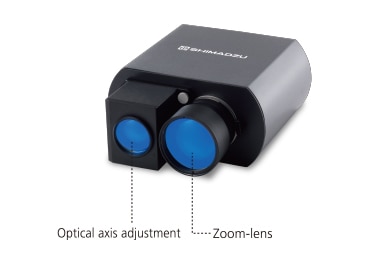
- The lineup includes an optional optical zoom set, which can detect smaller flaws.
Utilized in Various Industries

-
Ultrasonic optical flaw detection enables the visualization of internal flaws (at a depth of about 1 mm) that are hard to find using conventional ultrasonic testing. It can easily detect flaws in joints and bonding surfaces in research and development processes involving multi-materials, which are created by combining different materials to increase strength and reduce weight.
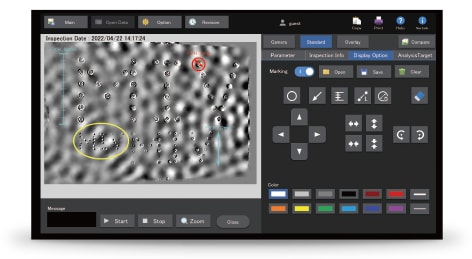
Inspection Result Screen
Características
-
With ultrasonic optical flaw detection technology, the sample is encouraged the displacement of the surface is detected optically, and the propagation of the ultrasonic wave on the surface is observed.
-
The MIV-X Ultrasonic Optical Flaw Detector assists with regions where ultrasonic testing (UT) is difficult. Leave the non-destructive inspection of surfaces and near surfaces to MIV-X!
-
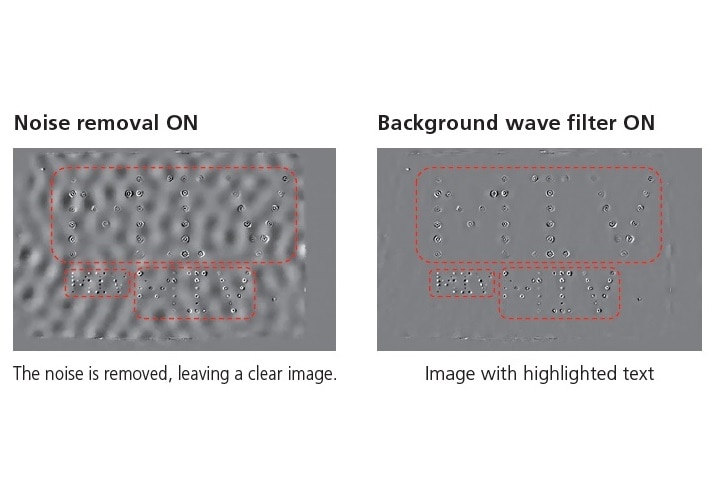
The instrument is equipped with a function to digitally remove noise in the window showing the propagation of the ultrasound, simplifying flaw identification.
-
The instrument is equipped with a user interface that simplifies operations, such as displaying a scale (ruler) on acquired images of cracks and peeling and measuring the distance between two selected points.
-
Decreases the minimum detection size by a factor of approximately two (MIV-X standard: From approximately 1 mm dia. to 0.5 mm dia.)
Laser optical axis adjustment is also possible, improving irradiation uniformity
Vídeos
-
MIV-X: Ultrasonic Optical Flaw Detector
-
MIV-X: Inspection Procedure in 4 Steps


